
Relive your childhood with these delightful Homemade Pop-Tarts! Skip the store-bought version and create these classic treats from scratch, with better ingredients and endless customization options. Therefore, get ready to bake a batch of warm, flaky, and flavorful Pop-Tarts that are way better than anything you can buy in a box! This recipe allows you to control the quality of ingredients, experiment with different fillings, and enjoy a truly homemade experience. It’s a fun project for bakers of all skill levels.
Table of Contents
Why Homemade Pop-Tarts Are Worth the Effort
What makes making Homemade Pop-Tarts so special? It’s the ability to create a truly custom and delicious treat. Homemade Pop-Tarts offer superior taste, texture, and ingredients compared to their processed counterparts. Therefore, it’s not just a pastry; it’s a labor of love. You can use real fruit fillings, high-quality chocolate, and buttery pastry to elevate this classic snack. It is a perfect activity for a weekend baking project or a fun family tradition. In conclusion, this recipe is a guaranteed crowd-pleaser.
Ingredients You’ll Need for Your Homemade Pop-Tarts
Before you start baking, gather all your ingredients. Furthermore, having everything measured and ready will make the process smoother and more enjoyable.
For the Crust:
- 2 1/2 cups all-purpose flour
- 1 teaspoon salt
- 1 cup (2 sticks) cold unsalted butter, cut into cubes
- 1/2 cup ice water
For the Filling:
- 1 cup fruit preserves (such as strawberry, raspberry, or blueberry)
OR - 1 cup chocolate hazelnut spread
OR - 1 cup homemade fruit filling (see variations below)
& Glaze:
- 1 cup powdered sugar
- 2-3 tablespoons milk
- 1/2 teaspoon vanilla extract
- Sprinkles, for decoration
Step-by-Step Instructions: Making Homemade Pop-Tarts
Follow these simple steps to create the most delicious Homemade Pop-Tarts you’ve ever tasted. Therefore, let’s get started!
- Make the Crust: First, in a large bowl, whisk together the all-purpose flour and salt.
- Cut in the Butter: Add the cold butter cubes and use a pastry blender or your fingertips to cut the butter into the flour until the mixture resembles coarse crumbs. Therefore, work quickly to prevent the butter from melting.
- Add Ice Water: Gradually add the ice water, 1 tablespoon at a time, mixing until the dough just comes together. Do not overmix.
- Divide and Chill the Dough: Divide the dough in half, flatten each half into a disc, wrap in plastic wrap, and chill in the refrigerator for at least 30 minutes. This allows the gluten to relax and prevents the dough from shrinking during baking.
- Prepare the Filling: While the dough is chilling, prepare your desired filling.
- Roll Out the Dough: On a lightly floured surface, roll out one disc of dough into a large rectangle, about 1/8 inch thick. Use a sharp knife or pizza cutter to trim the edges and create a neat rectangle.
- Cut Out Rectangles: Cut the dough into even rectangles, about 3×4 inches in size. You should get about 8-10 rectangles from each disc of dough.
- Place Filling: Spread about 1-2 tablespoons of your chosen filling onto the center of half of the rectangles, leaving a small border around the edges.
- Top with Dough: Gently place the remaining rectangles on top of the filled rectangles, lining up the edges.
- Seal the Edges: Use a fork to crimp the edges of each Pop-Tart to seal in the filling.
- Poke Holes: Use a toothpick or fork to poke a few holes in the top of each Pop-Tart. This allows steam to escape during baking and prevents the Pop-Tarts from puffing up too much.
- Chill: Place the assembled Pop-Tarts on a baking sheet lined with parchment paper and chill in the refrigerator for another 15 minutes. This helps them hold their shape during baking.
- Preheat Your Oven: Preheat your oven to 375°F (190°C).
- Bake: Bake the Pop-Tarts for 20-25 minutes, or until golden brown.
- Cool: Let the Pop-Tarts cool on the baking sheet for a few minutes before transferring them to a wire rack to cool completely.
- Make the Glaze: While the Pop-Tarts are cooling, make the glaze. In a small bowl, whisk together the powdered sugar, milk, and vanilla extract until smooth. Add more milk, 1 tablespoon at a time, until the glaze reaches the desired consistency.
- Glaze the Pop-Tarts: Once the Pop-Tarts are completely cool, spread the glaze over the tops of the Pop-Tarts using a spoon or spatula.
- Add Sprinkles: Immediately sprinkle the glazed Pop-Tarts with sprinkles, if desired.
- Let Glaze Set: Let the glaze set completely before serving or storing the Pop-Tarts. This will take about 30 minutes to an hour.
Tips for the Best Homemade Pop-Tarts
To ensure your Homemade Pop-Tarts turn out perfectly every time, here are some helpful tips and tricks. In addition, these tips will help you achieve bakery-quality results at home.
- Use Cold Butter and Ice Water: Cold ingredients are essential for creating a flaky crust. Therefore, use cold butter and ice water, and work quickly to prevent the butter from melting.
- Don’t Overmix the Dough: Overmixing can develop the gluten in the flour, resulting in a tough crust. Consequently, mix the dough until just combined.
- Chill the Dough Multiple Times: Chilling the dough multiple times helps relax the gluten and prevents the Pop-Tarts from shrinking during baking. Therefore, chill the dough after making it, after assembling the Pop-Tarts, and before baking.
- Seal the Edges Well: Properly sealing the edges of the Pop-Tarts is crucial for preventing the filling from leaking out during baking. Therefore, use a fork to crimp the edges tightly.
- Poke Holes in the Top: Poking holes in the top of each Pop-Tart allows steam to escape and prevents them from puffing up too much. Therefore, use a toothpick or fork to create the holes.
- Adjust Baking Time: Baking times may vary depending on your oven. Therefore, check the Pop-Tarts for doneness, and adjust the baking time as needed.
- Cool Completely Before Glazing: Glazing warm Pop-Tarts can cause the glaze to melt and run off. Therefore, ensure the Pop-Tarts are completely cool before glazing.
- Store Properly: Store the Pop-Tarts in an airtight container at room temperature for up to 3 days. Therefore, this will help maintain their freshness.
Creative Filling Variations for Your Homemade Pop-Tarts
One of the best parts about making Homemade Pop-Tarts is the ability to customize the fillings. In addition, these variations will inspire your creativity in the kitchen.
- Strawberry Pop-Tarts: Use strawberry preserves or homemade strawberry filling for a classic flavor.
- Blueberry Pop-Tarts: Use blueberry preserves or homemade blueberry filling for a fruity and delicious treat.
- Cherry Pop-Tarts: Use cherry preserves or homemade cherry filling for a tangy and sweet flavor.
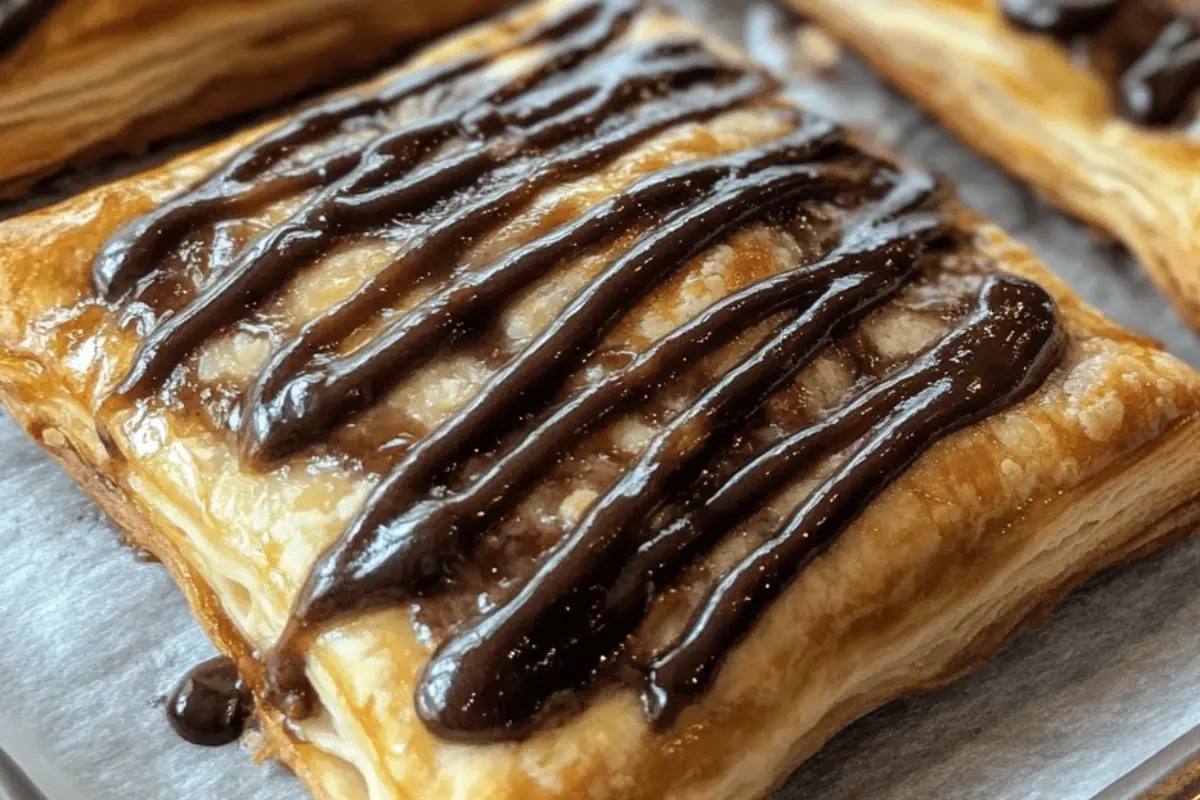
- Chocolate Pop-Tarts: Use chocolate hazelnut spread or homemade chocolate ganache for a decadent treat.
- Brown Sugar Cinnamon Pop-Tarts: Mix brown sugar, cinnamon, and a little butter for a warm and spiced filling.
- Apple Cinnamon Pop-Tarts: Use homemade apple cinnamon filling for a fall-inspired flavor.
- Pumpkin Spice Pop-Tarts: Use homemade pumpkin spice filling for a seasonal treat.
Homemade Fruit Filling Recipe
Here’s a basic recipe for making your own fruit filling:
- 2 cups chopped fruit (such as strawberries, blueberries, cherries, or apples)
- 1/4 cup sugar
- 2 tablespoons cornstarch
- 1 tablespoon lemon juice
- 1/4 teaspoon cinnamon (optional)
- Combine all ingredients in a saucepan.
- Cook over medium heat, stirring constantly, until the mixture thickens and the fruit is tender, about 5-7 minutes.
- Let cool completely before using as a filling for your Pop-Tarts.
Serving Suggestions for Your Homemade Pop-Tarts
Homemade Pop-Tarts are perfect on their own, but they can also be enjoyed in many other ways. In addition, here are some serving suggestions to elevate your experience.
- Warm: Warm the Pop-Tarts in the toaster or oven for a few minutes for a warm and comforting treat. Therefore, this enhances the flavors and textures.
- With Milk: Serve the Pop-Tarts with a glass of cold milk for a classic combination. Therefore, this is a simple yet satisfying option.
- With Coffee or Tea: Enjoy the Pop-Tarts with a cup of coffee or tea for a comforting snack. Therefore, the sweet and flavorful Pop-Tarts pair perfectly with warm beverages.
- As a Dessert: Serve the Pop-Tarts as a dessert after a meal for a sweet and satisfying ending. Therefore, this is perfect for both kids and adults.
- In Lunchboxes: Pack the Pop-Tarts in lunchboxes for a homemade and nostalgic treat. Therefore, this is a great way to surprise and delight.
- At Parties: Serve the Pop-Tarts at parties or gatherings for a fun and unique dessert option. Therefore, this is a guaranteed crowd-pleaser.
The Nutritional Considerations of Homemade Pop-Tarts
Homemade Pop-Tarts, like most pastries, should be enjoyed in moderation. Here’s a general nutritional breakdown:
| Nutrient | Amount (per Pop-Tart) | Considerations |
| Calories | Approximately 300 | Depends on filling and glaze. Provides energy. |
| Carbohydrates | Varies | Primarily from flour and sugar. Provides the body with its primary source of energy. |
| Fat | Varies | From butter. Provides essential fatty acids. However, moderation is key due to the saturated fat content. |
| Sugar | Varies | From sugar, fruit preserves, and glaze. Provides sweetness and flavor. |
| Other Minerals | Trace amounts | Small amounts of various minerals from the flour, sugar, fruit, and other ingredients. |
Note: Nutritional values are approximate and can vary based on specific ingredients and serving sizes. This table provides a general guideline to understand the nutritional profile of consuming Homemade Pop-Tarts. It is important to consider portion sizes due to the high calorie, sugar, and fat content.
Frequently Asked Questions (FAQs) About Homemade Pop-Tarts
Here are some frequently asked questions about making Homemade Pop-Tarts, addressing common concerns and providing helpful tips. In addition, this will ensure you have all the information you need.
- Why is my crust tough?
- Tough crust is often caused by overmixing the dough or using too much water. Therefore, mix the dough until just combined and measure the water accurately.
- Can I use a store-bought pie crust?
- Yes, you can use a store-bought pie crust for convenience. However, homemade crust will provide a better flavor and texture. Therefore, for the best results, it’s recommended to make the crust from scratch.
- How do I store leftover Pop-Tarts?
- Store leftover Pop-Tarts in an airtight container at room temperature for up to 3 days. Therefore, this will help maintain their freshness.
- Can I freeze the Pop-Tarts?
- Yes, you can freeze the Pop-Tarts for up to 2-3 months. Therefore, wrap them individually in plastic wrap and then place them in a freezer-safe bag or container. Thaw them completely before serving.
- What can I use as a filling?
- You can use a variety of fillings for Pop-Tarts, such as fruit preserves, chocolate hazelnut spread, or homemade fruit filling. Therefore, experiment with different fillings to find your favorite combination.
- How do I prevent the filling from leaking out?
- To prevent the filling from leaking out, seal the edges of the Pop-Tarts well with a fork. Therefore, crimp the edges tightly and avoid overfilling the Pop-Tarts.
- Why are my Pop-Tarts not browning?
- Pop-Tarts that are not browning may be due to using an oven that is not hot enough. Therefore, ensure your oven is preheated to the correct temperature.
- Can I make Pop-Tarts without gluten?
- Yes, you can make Pop-Tarts without gluten by using a gluten-free flour blend. Therefore, ensure the flour blend is designed for baking.
- Why is my glaze too thin?
- Thin glaze is often caused by adding too much milk. Therefore, add milk gradually, 1 tablespoon at a time, until the glaze reaches the desired consistency.
Conclusion: Enjoy Your Homemade Pop-Tarts
Congratulations! You’ve just baked a batch of delicious Homemade Pop-Tarts. Therefore, these nostalgic treats are perfect for any occasion and are sure to impress. Enjoy the warm, flaky pastry and flavorful filling in every bite. This recipe brings a touch of homemade goodness to a classic snack. In conclusion, happy baking!